[Home-K8S] #22 FluxCD 계층과 분리 / 다중 클러스터 리소스 공유와 설정 분리
FluxCD - yaml 앞서 fluxcd 를 이용해서 helm chart 를 구성했습니다. 그 외에 일반적인 yaml

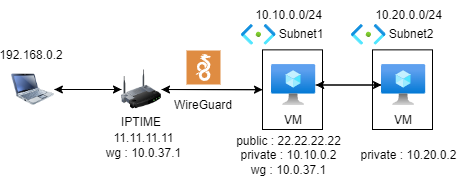
iptime 공유기의 WireGuard 서버를 이용하여 Azure VM에서 iptime 내부의 네트워크와 통신을 진행하려고 한다.
또한, Terraform 을 이용하여 모든 과정을 자동화 한다.

고급 설정 -> VPN 설정 -> WireGuard 서버 설정 (실행, NAT on 하고 적용)
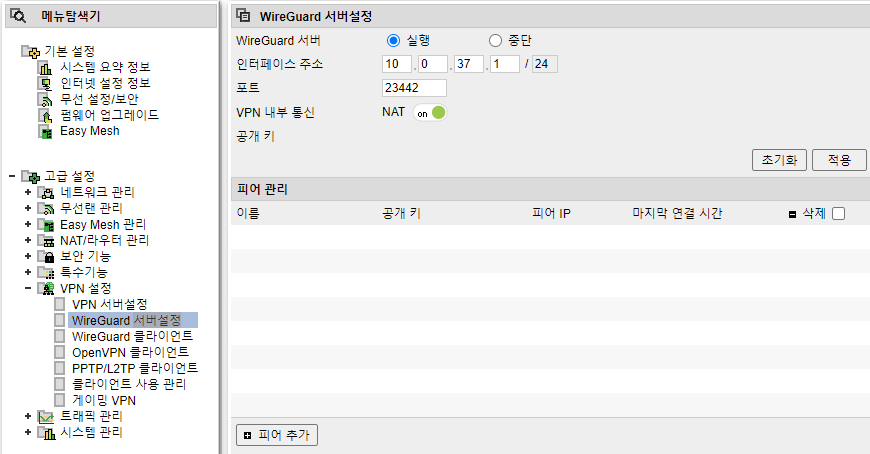
피어 추가 -> 자동피어 추가 -> 이름 입력(아무거나) -> 추가 -> 피어설정 다운로드
다운받은 피어 설정을 열어보면 다음과 같은 형식으로 되어 있을 것이다.
[Interface]
PrivateKey =
Address =
DNS =

[Peer]
PublicKey =
AllowedIPs =
Endpoint =
PresharedKey =
위의 설정들을 가지고 Azure VM 위의 wiregurad 에 설정을 해 줄 것이다.
VPN을 설정할 VM은 Ubuntu 18.04를 사용하였고, 명령어 템플릿은 다음과 같으며,
내부 IP는 기본 설정인 192.168.0.0/24를 기준으로 작성하였다.
기본적으로 ufw 또는 nsg와 같은 설정은 wireguard 서버 설정에 나온 포트를 사용하면 된다.
# terraform의 template 파일 설정
data "template_file" "userdata" {
  template = file("userdata.tpl")
  vars = {
    client_private_key = var.client_private_key
    client_address = var.client_address
    dns_server = var.dns_server
    server_public_key = var.server_public_key
    endpoint = var.endpoint
    preshared_key = var.preshared_key
  }
}
# userdata.tpl 파일 설정
#!/bin/bash

# WireGuard 설치
sudo apt update
sudo apt install -y wireguard resolvconf

# Update /etc/hosts to resolve host name issue
sudo sh -c 'echo "127.0.1.1 $(hostname)" >> /etc/hosts'

# WireGuard configuration
cat <<EOT > /etc/wireguard/wg0.conf
[Interface]
PrivateKey = ${client_private_key}
Address = ${client_address}
DNS = ${dns_server}

[Peer]
PublicKey = ${server_public_key}
Endpoint = ${endpoint}
AllowedIPs = 192.168.0.0/24
PresharedKey = ${preshared_key}
EOT

# IP Forwarding 설정
sudo sysctl -w net.ipv4.ip_forward=1

# Enable and start WireGuard
sudo systemctl enable wg-quick@wg0
sudo wg-quick up wg0
# wg0 로 나가는 패킷에 마스킹 적용
sudo iptables -t nat -A POSTROUTING -o wg0 -j MASQUERADE
sudo iptables -A FORWARD -i eth0 -o wg0 -j ACCEPT
sudo iptables -A FORWARD -i wg0 -o eth0 -j AC7CEPT
sudo ip route add 192.168.0.0/24 dev wg0

# iptables 설정 저장
sudo debconf-set-selections <<EOF
iptables-persistent iptables-persistent/autosave_v4 boolean true
iptables-persistent iptables-persistent/autosave_v6 boolean true
EOF
sudo apt-get -y install iptables-persistent
각 변수들은 WireGuard 피어 설정들을 사용하면 된다.
위의 명령어로 Azure VM 을 만들게 되면 자동으로 VPN이 연결되어,
10.10.0.2 -> 192.168.0.2 로 ping을 보낼 수 있게 된다.
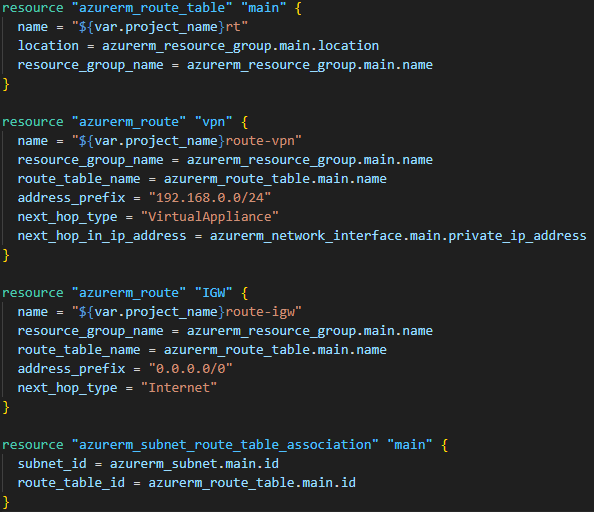
이제 Azure VM 위에 Forwarding 설정을 진행하여, VM -> VM -> wg0 -> iptime 이 되어야 한다.
위의 설정 중 "IP Forwarding 설정" ~ "마스킹 적용" 까지 forwarding을 위한 설정이며, 통신을 보내려는 VM(10.20.0.2) 의 경우에는 아래의 설정만 적용해 주면 된다.
sudo apt-get update
sudo ip route add 192.168.0.0/24 via 10.0.255.4 dev eth0
이론적으론 위와 같은 설정만으로 적용이 완료되어야 한다.
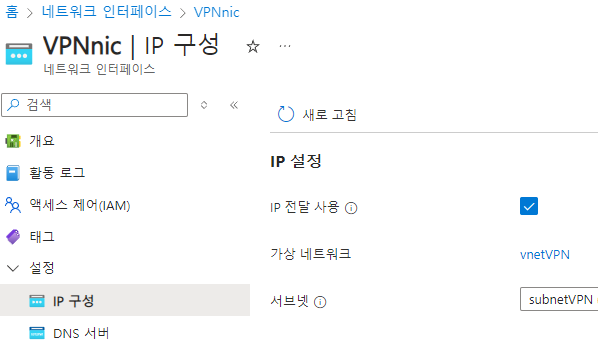
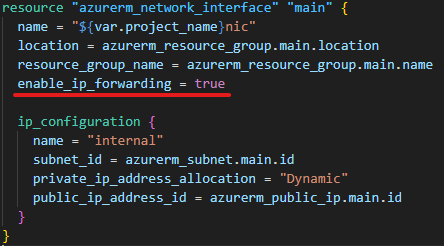
그 외에 여러가지 설정들을 해줘야 하는데 우선 Portal에서의 설정이 필요하다.
다음 설정들을 찾느라 오랜 시간이 걸렸다.
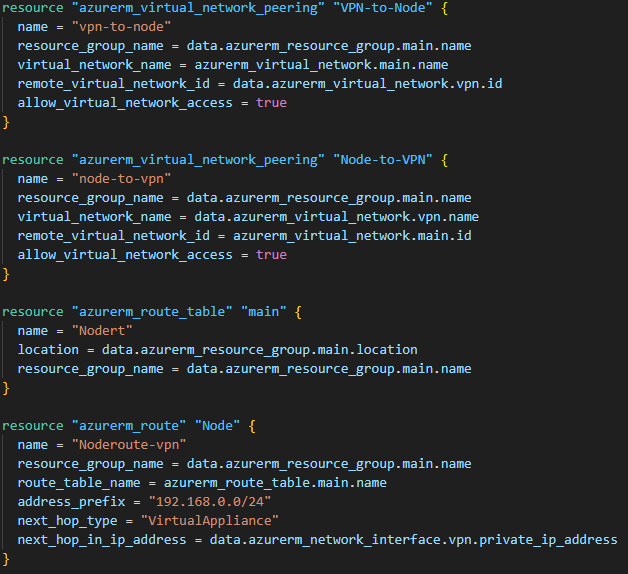
외부 10.0.0.0 -> 192.168.0.0/24 로는 통신이 되지만,
역으로 192.168.0.0/24 -> 10.20.0.0/16 으로는 통신이 안된다.
iptime의 Wireguard 서버는 상세하게 설정이 안되기 때문에, 한계가 있는 것으로 보인다.
다음 포스트에는 "iptime Wireguard Server" 와 "Azure VM Wireguard Client" 가 아니라,
"iptime Wireguard Client" 와 "Azure VM Wireguard Server" 의 설정을 가지고 해보겠다.
Comments